3D Rendering: A Guide to Organizing Projects for Cost-Effectiveness
3D rendering can be a godsend in keeping catalog imagery costs down. Over the years, I’ve found a handful of key considerations that have the greatest impact on the final project cost. Keeping these in mind while planning your next rendering project will keep things as cost-effective as possible.
Highlights
In this article, I’m going to cover the following topics as they relate to 3D rendering projects
- How to plan a project to optimize for each stage
- 3D model requirements
- Cost-saving corner-cutting
- The 90% Rule
- Key information to provide
- How to effectively communicate project goals
- Common myths about rendering costs
Quick Introduction
All 3D projects share certain similarities and requirements: 3D models are needed, textures are needed, rendering takes place, and touch-ups are done after the fact. Each of these steps has the potential to be approached in ways that can save you money.
Every project is different and careful consideration should be given upfront to recognize the best cost-saving strategies. Take furniture rendering for example; omitting elements like drawer sliders can save time during the 3D modeling phase. Obviously, this is only possible if the drawer sliders don’t need to appear in the final renderings.
Cost-Saving Strategies
Create a Project Outline + Strategy
Specific outlines of project requirements help avoid unnecessary work. I find that taking the time to create a very detailed project outline helps avoid a headache. Not only does a detailed project outline help keep everything streamlined, but it also helps understand requirements that might not be readily apparent.
Example: A few years ago, I was working with a client that was creating 3D models for a product customizer application. The application would allow customers to select certain modular pieces, combine them, pick a finish, and get a quote. There were 9 unique project styles, each of which had 9 sub-styles (different arms, feet, etc), and 9 different finish options. That project seemed simple at first glance but the math proved otherwise 9 x 9 x 9 = 729 renderings!
Carefully Consider What’s Required for Final Images
Considering the format, resolution, and camera angles required for final images will help identify cost-saving strategies during the 3D modeling, UV Mapping, and Texturing states of rendering. Close-up shots of things like chair seats, fabrics, nailheads, or carvings mean extra work for 3D artists. If the project doesn’t require that close-up shots be rendered, 3D artists can spend less time creating details on 3D models, textures, and even lower rendering costs.
Example: I recently worked on a project where several hundred images were rendered to showcase several product variations, in several finishes, within several rooms. All the final images showcased the product from ~10ft away in the scene—meaning no close-ups were required to showcase the finer aspects of the finish texture. That allowed me to use less robust render settings, create fewer texture maps, and spend less time creating virtual materials. I estimate 10% of the total project cost was saved by recognizing the level of detail required at the project start.
Cutting Corners When Possible
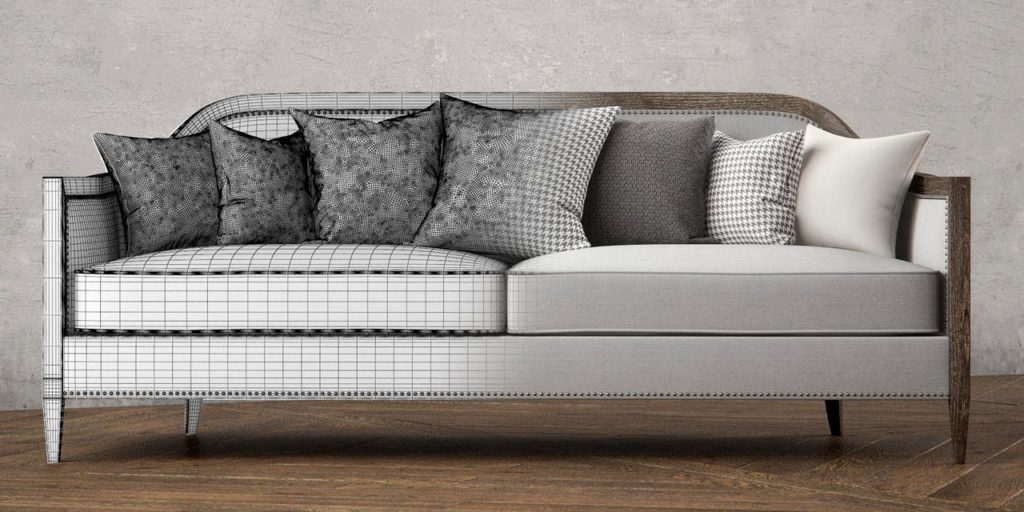
I find that most projects can make sacrifices to quality without greatly affecting the quality of the final images. These are always project-specific possibilities—but they’re always there somewhere! When textures only need to be close matches artists can forego the process of creating a rendering texture in many cases. When 3D models are going to be used for real-time applications, artists can forego creating high-poly details such as stitching, welting, or edge chamfering. 3D models can be updated to remove these details but you can never get back the time required to create them in the first place.
Example: I was recently working with a client to create a series of renderings to pitch a manufacturer on their initial design. No buyer commitment had been made yet, so keeping project cost to a minimum was essential, especially considering revisions were likely. One of the designs was a shelter bed with an upholstered headboard. My client wanted to see several variations in the tufting pattern on the headboard—which can be tough to model. Knowing that the final images were for conversational purposes only—not to sell directly to consumers—I was able to skimp on the level of detail on the 3D models and do a lot of the heavy lifting in Photoshop after the fact.
The 90% Rule: A Practical Quality Guideline
Even the best 3D modeling programs can’t reach real-world detail in most cases. At some point, the amount of quality an artist can produce given additional time is no longer cost-effective. This is no strike on the caliber of artists in most cases and simply reflective of what is technologically possible. I always try to generate rendered images that meet 90% real-wold photorealism. Beyond that, I find most attempts at additional realism requires a level of investment an average project shouldn’t consider. i.e. unless you’re working on the next Hollywood Blockbuster, don’t worry that a linen texture doesn’t simulate its real-world reflectance value perfectly!
Example: Cloth can be a tricky material to render. It has subtle reflective properties and an almost fractal depth of texture quality. For close-ups, it’s only practical to create larger details such as stitching or seamlines on a 3D model. For the actual fabric textures, a 90%+ level of realism can be achieved by using displacement or bump maps to simulate actual geometry. 90% realism might be achievable for $150 while 95% realism might require 10x that amount. In most cases, I find the extra 5% isn’t worth the additional investment.
Key Information for Rendering Projects
I can’t overstate the importance of having as much information as possible prior to starting projects. The first stage of every rendering project should consist of these steps:
1. Reference Images
Pictures can often be worth 1000 words. Having reference images is essential to ensure 3D artists capture the vision for 3D projects. Textures, camera angles, and room scenes are all useful tools. At the very least, spend a few minutes on Pinterest or Instagram looking for examples of how you imagine the final images to appear.
Example: I was recently putting together a scene for a client who only had a rough idea of what they wanted in terms of style. Their description was a bit vague, so I requested 3-5 images that represented the look they were going for. In a few short minutes, the project was on track and I was able to create a room scene in line with the client’s vision. This saved countless email exchanges and likely several initial revisions.
2. CAD/Sketch Files/Existing 3D Models
Project costs can drop dramatically when 3D artists have enough information to ensure accurate 3D models. Images are better than nothing, but files like AutoCAD documents (.dwg) allow artists to measure different parts of a design quickly and effectively. Providing existing 3D models of similar designs can also save time by allowing 3D artists to re-use components or—at the very least—have an idea of the quality you expect to be delivered. Sometimes just seeing a model can inform an artist on which details can be omitted.
Example: I was recently working on a project to create images for a furniture retailer/manufacturer’s catalog. These images required an extra level of 3D model quality since they were meant to serve in the place of consumer-facing product photography. I had to place hinges, drawer slides, and internal parts to showcase the pieces with doors open/closed, and demonstrate how latching mechanisms were placed. The client provided an old 3D model that had similar hardware to illustrate where and how the placements should be made. I wasn’t able to use the actual hardware—but seeing how it had been placed saved me several hours of back and forth to get it right.
3. Make A Shotlist
My first step for any rendering project is to create a list of each final image required. This helps keep projects focused but can also help double-check things initially. I find that many projects start out a bit ambitious only to later realize that many more images will be required than initially thought. This puts clients and 3D artists in an unfavorable situation. Not only is it impossible to maintain an initial project quote when more images are required but sometimes projects get scrapped entirely in these cases.
Example: Consider the following fictitious 3D furniture project consisting of the following pieces:
- Bed
- Nightstand
- Dresser
- Mirror
- Drawer Chest
Let’s say each design needs 5 SILO (plain white background) images, has 3 finish variations, requires one collection shot, and has an average image price of $65. That’s 5 models x 5 SILO angles x 3 Finishes + 1 Collection for a total of 76 images coming to $4,940.00.
By removing a single finish variation and two SILO image angles, the project would then become 5 designs x 3 SILO angles x 2 finishes + 1 collection image for a total cost of $2,015.00. That’s nearly $3,000 cheaper, and still provides a decent series of images!
Grouping Similar Tasks
Every stage of 3D rendering involves different types of considerations. Having shotlists, reference images, and a clear vision of project goals helps keep costs down through better organization. One often-overlooked aspect of project planning is grouping similar tasks whenever possible. Artists shift into different mindsets—at least I do, that’s for certain—during different stages of the rendering process.
3D modeling requires a certain mindset, UV Mapping requires another, and touching-up images before final delivery involve another. Creating all 3d models first, then creating UV mapping solutions and texturing, and then rendering everything can help maintain a state of flow that creates a more efficient workflow. I think sometimes this can be explained as simply as limiting the number of times an artists has to change between different software packages each hour.
Example: I recently worked on a project that involved creating 50+ 3D models resulting in over 1500 unique renderings. The start of the project required some proof-of-concept renderings, approached a single model at a time. A series of 30 images were created for 3 different models, each with revision/approval stages. The average cost-per-image of these renderings came out to be $57.
Once the approach was approved, the remainder of the project was completed by first creating all 3D models, the UV Mapping + Texturing all models, then setting up 3D scene files, then submitting all files for network rendering, and then editing each image in Photoshop. The resulting per-image price was $36.50—reflecting a 35%+ decrease in per-image cost. All because similar tasks were able to be grouped after the initial test renderings!
Common Rendering Myths
3D rendering services are advertised in any number of ways. Some are billed hourly, some are quoted per project, and others have monthly retainers. Regardless of approach, there are some common areas in which many rendering companies choose to misrepresent details of projects—usually in order to artificially inflate billable hours. Save on your next project by being aware of these common myths touted by too many rendering companies:
1. Each image costs the same to produce
The biggest fib I see rendering companies telling clients is reflected in their pricing structures. The notion that initial renderings require the same cost as subsequent images is ludicrous. Consider this: the first image requires creating a 3D model, developing a 3D material + Texture, creating a 3D lighting solution, and creating a composition for the final image. Now let’s say you need a second image showing a product in a different finish. That’s as easy as loading the last scene, creating a new material, and clicking “re-render.”
2. You Get to Keep Your 3D Models + Assets
Not all service contracts make explicit consideration for what types of files will be delivered. All projects should clearly outline how project files will be handled upon project completion. Some agencies—not Rendernode—will not consider handing over project files in such a way that would remove their role from future projects. That’s to say; they’ll hold onto your 3D models so you’re forced to use their services in the future (unless you want to start from scratch.)
There are many cases where Rendering providers may be restricted in what they’re able to provide. For example, a rendering provider might not be licensed to distribute stock assets that were used in a render scene. In some cases, stock assets may be used on 3D models to cut corners and save on project costs in such a way that prevents a rendering provider from turning those models over. Make sure everyone is on the same page before starting out.
3. Rendering is Expensive
Computers require heavy amounts of processing power while rendering. This means that artists aren’t able to use their workstations as easy, as their system is too busy rendering to do things like 3D modeling (or even checking email sometimes!) To get around this type of hurdle, cloud rendering services can be used to help streamline projects. These services aren’t expensive but they also aren’t free. Expecting a cost of anywhere from $1.5-5 per final image is a reasonable price estimate for rendering. For a project totaling only 5 images—that’s pretty negligible. For an animation project with 1024 frames—that can start to add up fast!
4. They’ll Keep Backups of Images for You
Data storage is cheap as it’s even been. A free Google account allows for 15GB of free storage in the Google Drive product. That’s incredible considering how much a 1GB hard drive cost just 8-10 years ago. Still, data isn’t free. Upon receiving deliverables from a 3D rendering project make sure to create backups and store them in a safe place. Many rendering services will retain images and project assets for a certain number of days—though some will delete them immediately. After this grace period, most companies will remove the majority of previous project files as a part of regular data storage house cleaning.
Final Thoughts
3D rendering can dramatically cut down on product imagery costs. Photorealistic images are quickly becoming the new standard for retailers and studio photography is being reserved only for projects with gigantic budgets. The tips, cautions, and guidelines outlined in this article are those I’ve developed over nearly 15 years working as a visualization artist. These are the guidelines I use on every project I work on and encourage anyone—both artists and customers alike—to consider them before starting their next project as well.


